
|
Many manuals of computer programming languages start with their answer on the following question:
How do I write the text “Hello world” on the screen?
For the Praat scripting language, there are two answers.
The simplest answer is that you open the ScriptEditor window with New Praat script from the Praat menu, then type the following line into the ScriptEditor window:
writeInfoLine: “Hello world”
and finally choose Run from the Run menu.
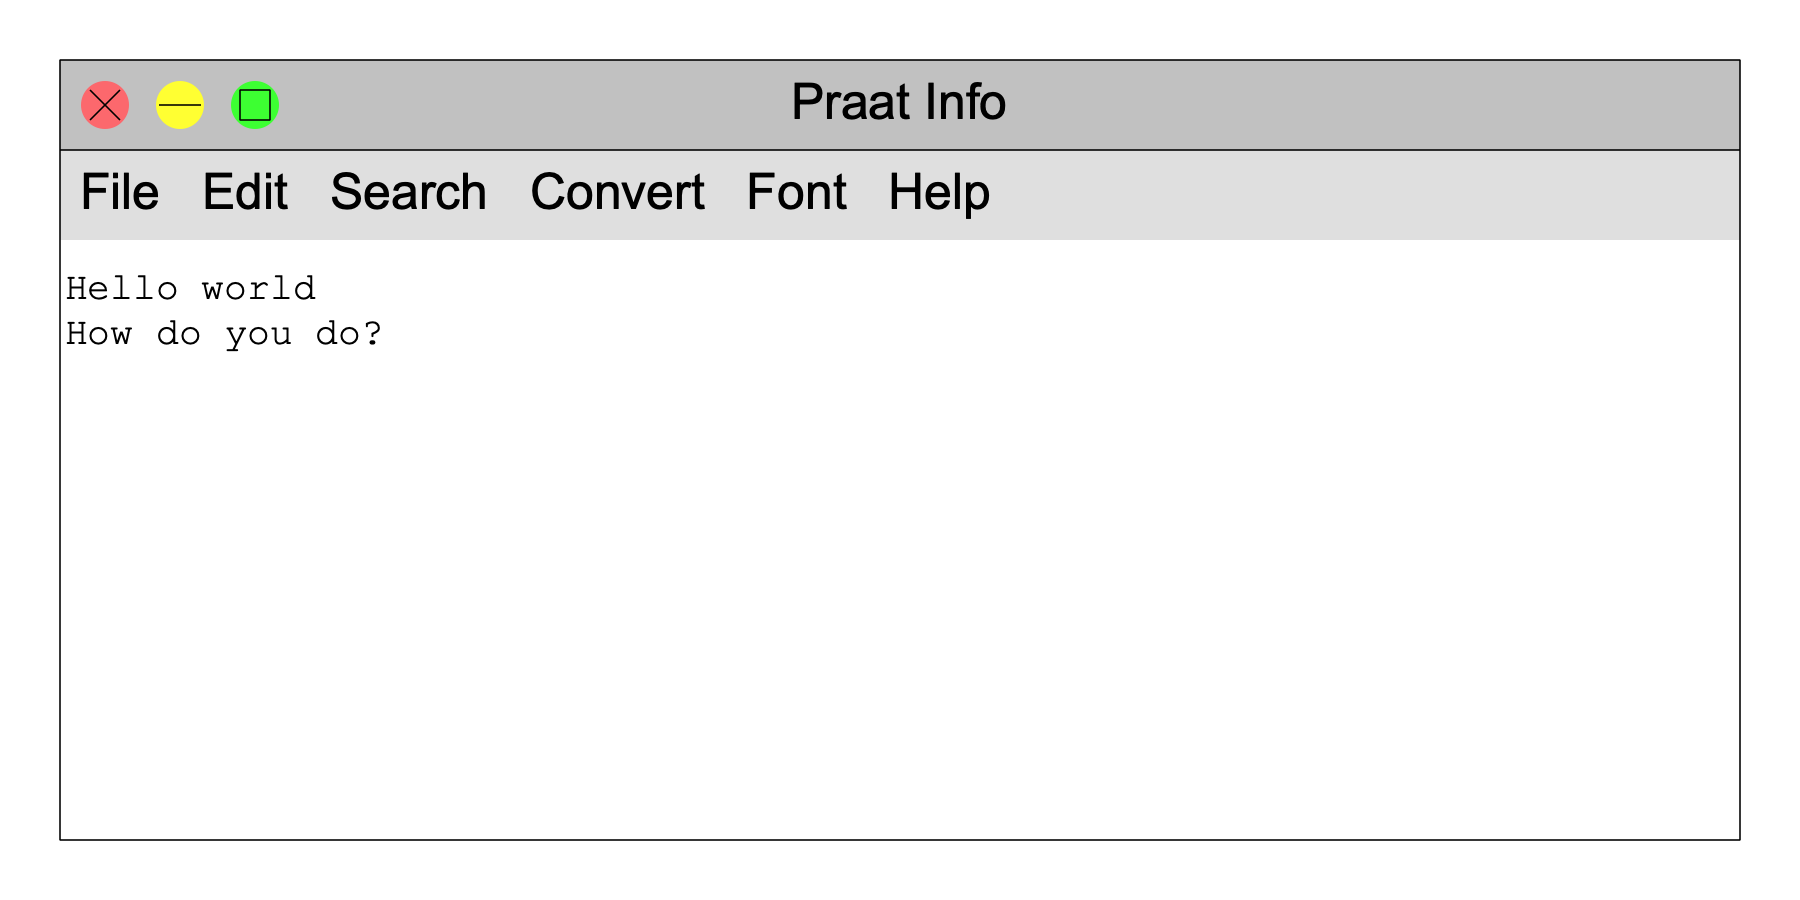
When you try this, the result should be that the Info window comes to the front, and that it shows the text Hello world:
Now suppose that you want to write two lines instead of just one, so you try a script with two lines:
writeInfoLine: “Hello world”
writeInfoLine: “How do you do?”
This turns out not to do what you want: it seems to write only the text “How do you do?”. This happens because the writeInfoLine function first erases the Info window, then writes the line of text. So the first line of the script did write the text “Hello world”, but the second line wiped it out and wrote “How do you do?” instead. The script that does what you want is
writeInfoLine: “Hello world”
appendInfoLine: “How do you do?”
Now the result will be
This works because appendInfoLine writes a line without erasing the Info window first.
Finally, try the following script:
appendInfoLine: “Another try”
appendInfoLine: “Goodbye”
The result could be
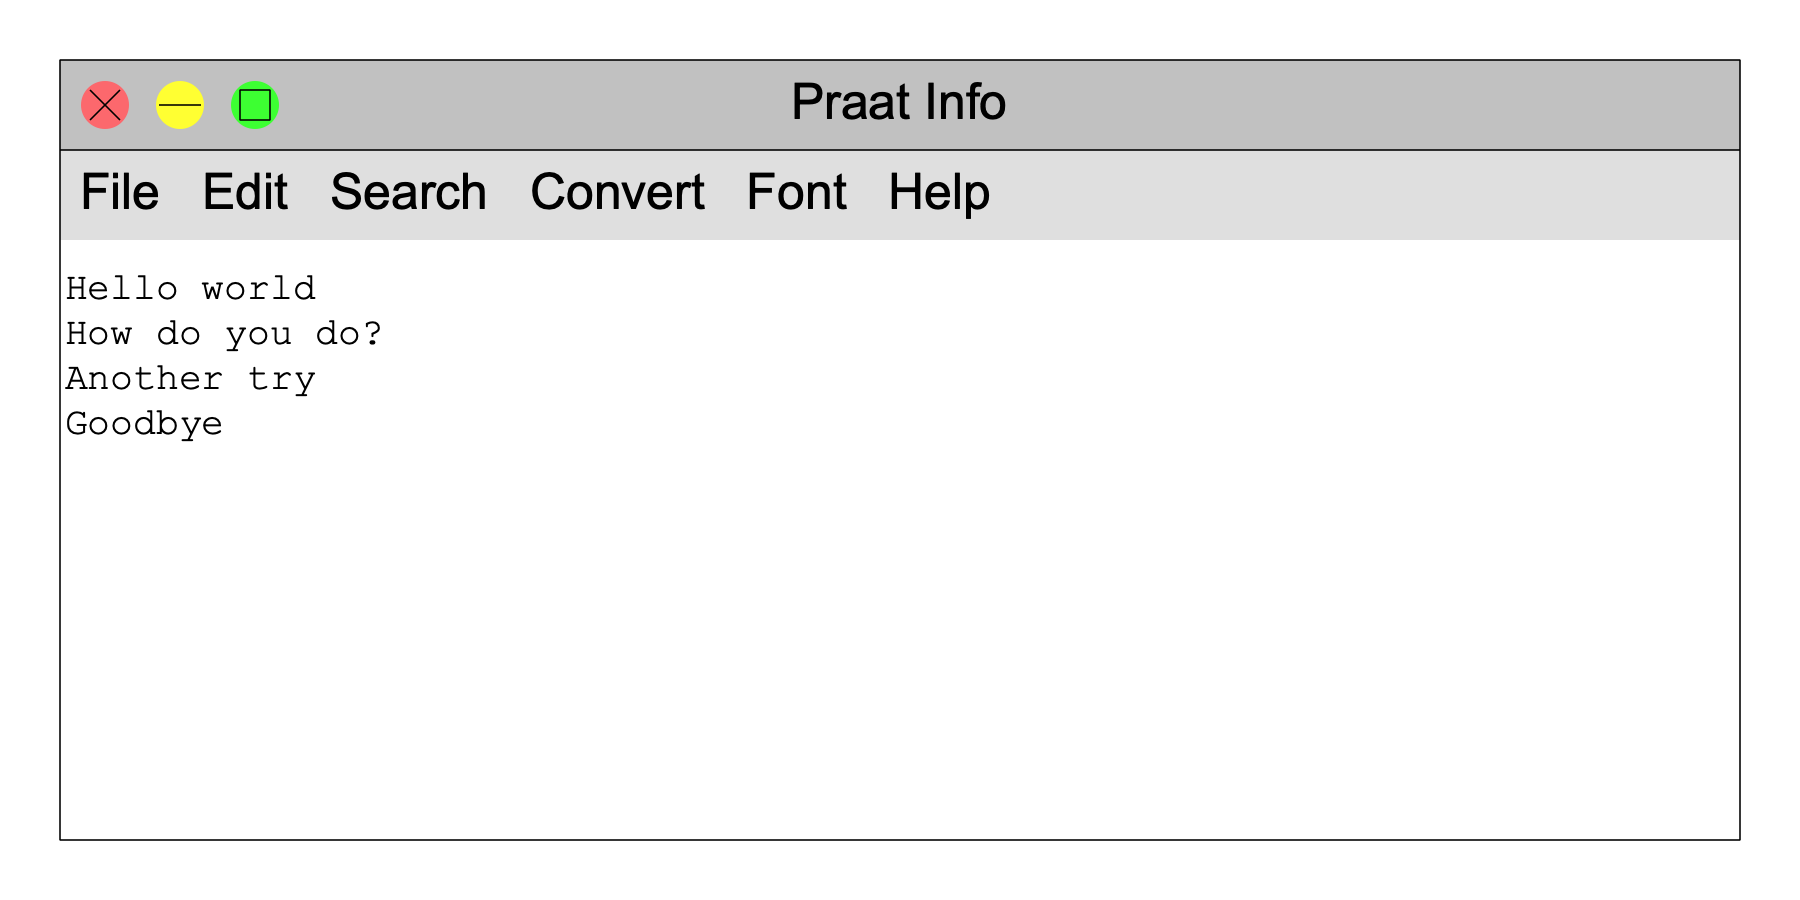
In other words, appendInfoLine writes lines into the Info window without erasing it, even if you run a script anew. This is why many Praat scripts that write into the Info window do a writeInfoLine first, and follow it with a series of appendInfoLine calls.
For more information on these commands, see Scripting 6.2. Writing to the Info window.
You can also show text in the Picture window. If you are an experienced Praat user, you have probably used the comamnd Text top... before. You can use it do draw a text at the top of the current viewport, which is the part of the Picture window where the next drawing will occur and which is marked by the pink margins. Thus, when you select the top 4×3 inches of the Picture window (with the mouse), set the font size to 12 (with the Pen menu), and run the script
Text top: “yes”, “Hello world”
then you’ll see
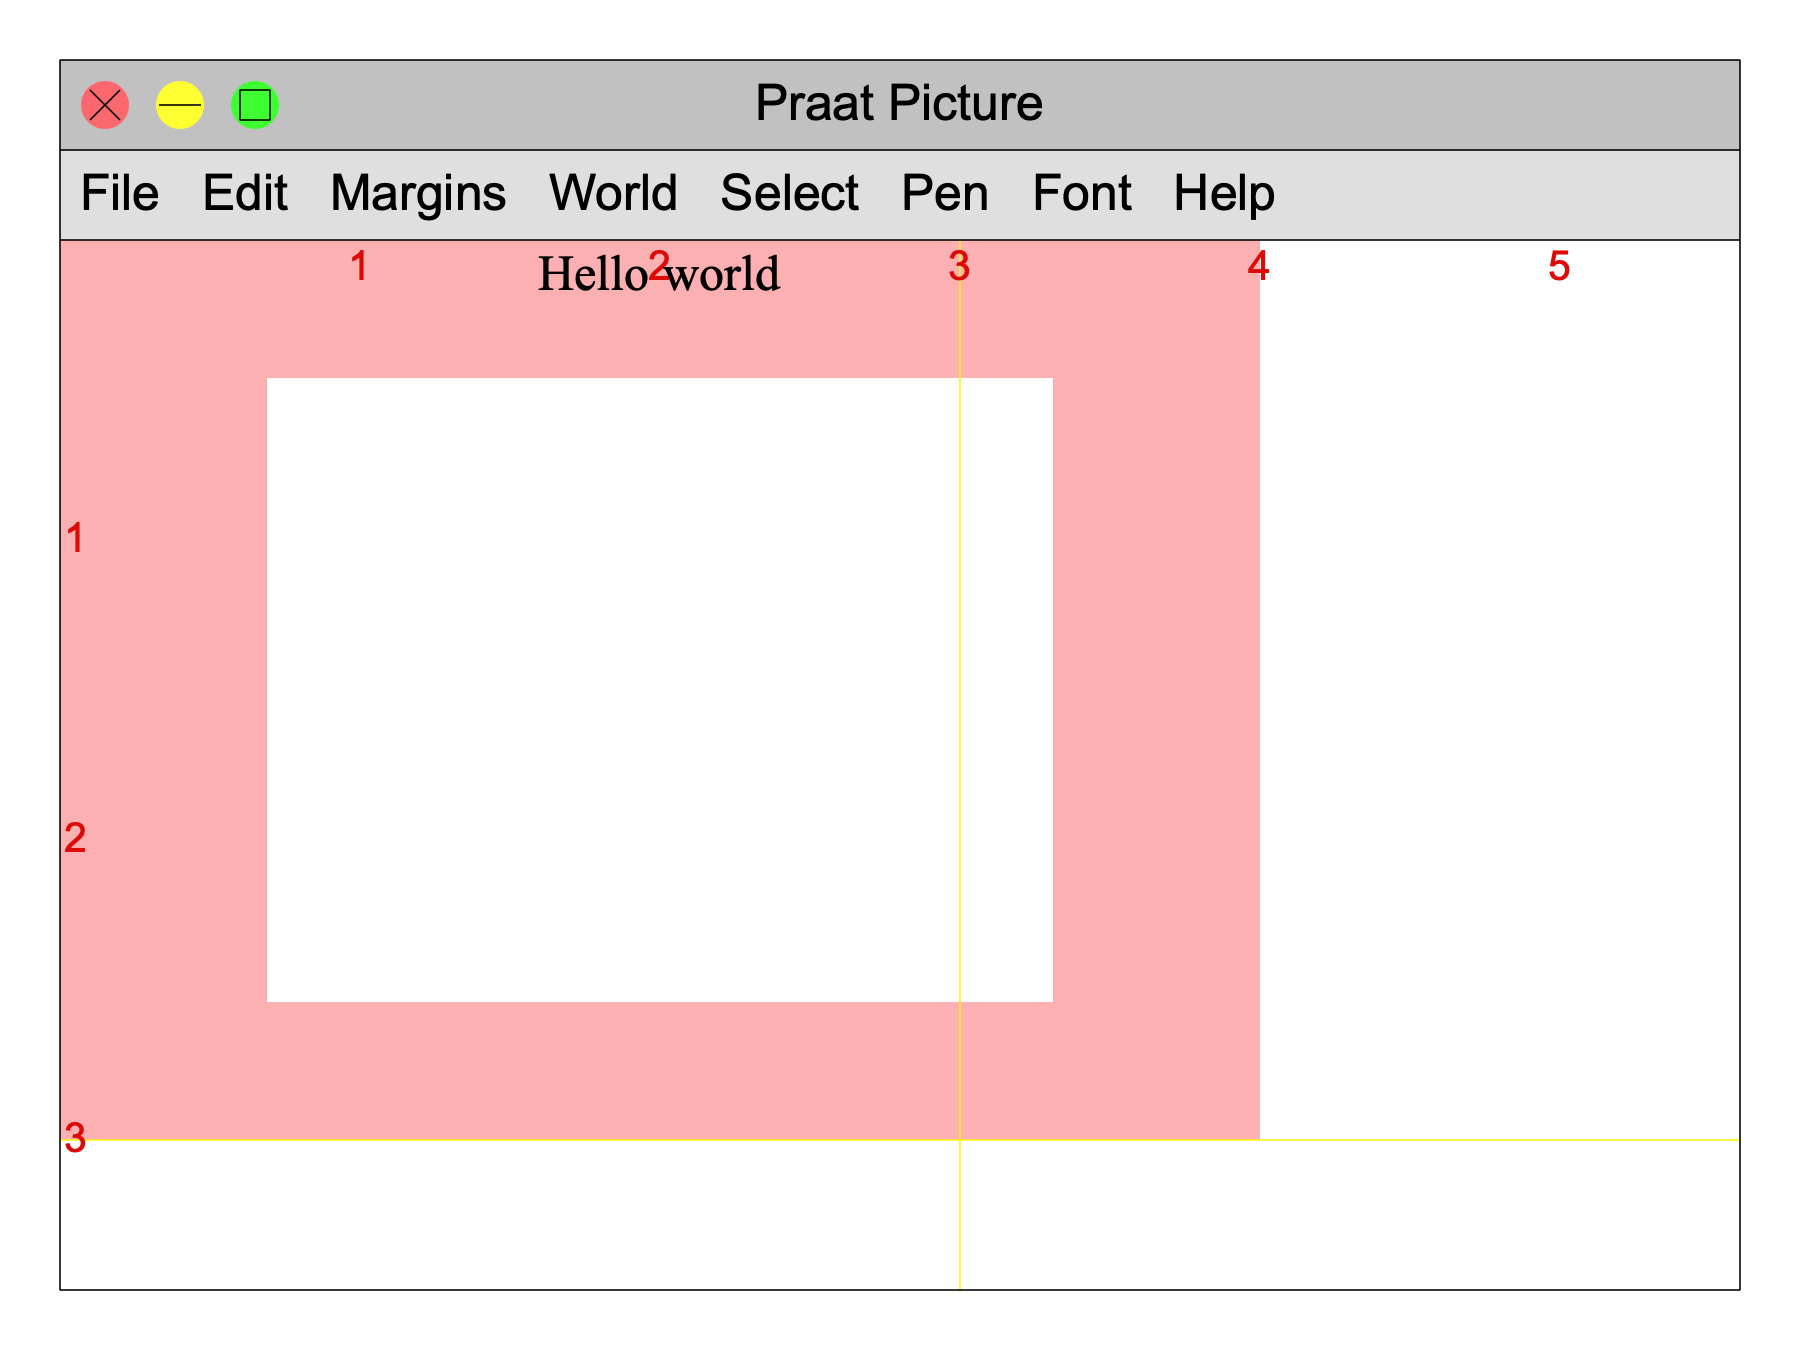
So this works the same as when you choose Text top... from the Margins menu by hand, with Far switched on.
If you want your script to always show the same text at the same position, with nothing else in the picture, then you can make your script a bit more extensive:
Erase all
Times
Font size: 12
Select outer viewport: 0, 4, 0, 3
Text top: “yes”, “Hello world”
In this script, line 1 erases the Picture window, so that nothing besides your text can appear in the Picture window.
Line 2 executes the command Times from the Font menu, so that the script will always draw the text in Times, even if you choose Helvetica in the Font menu with the mouse before you run the script (after the script has run, you’ll see that Times is chosen in the Font menu).
Line 3 executes the command Font size... from the Font menu, setting the font size to 12 and setting the width of the pink margins accordingly.
Line 4 executes the command Select outer viewport... from the Select menu. This performs an action that you would normally do by dragging the mouse, namely selecting the part of the Picture window that runs from 0 to 4 inches horizontally and from 0 to 3 inches vertically. After running the script, the viewport is indeed [0, 4] × [0, 3], as you can clearly see from the pink margins above.
Line 5 finally writes the text.
For more information on these commands, see Picture window.
© ppgb 20140111