|
Not all menu commands are as simple as those on the previous page, which act immediately once you choose them from a menu (e.g. Play, Erase all). Most commands in Praat require the user to supply additional information; these are the commands whose title ends in “...”.
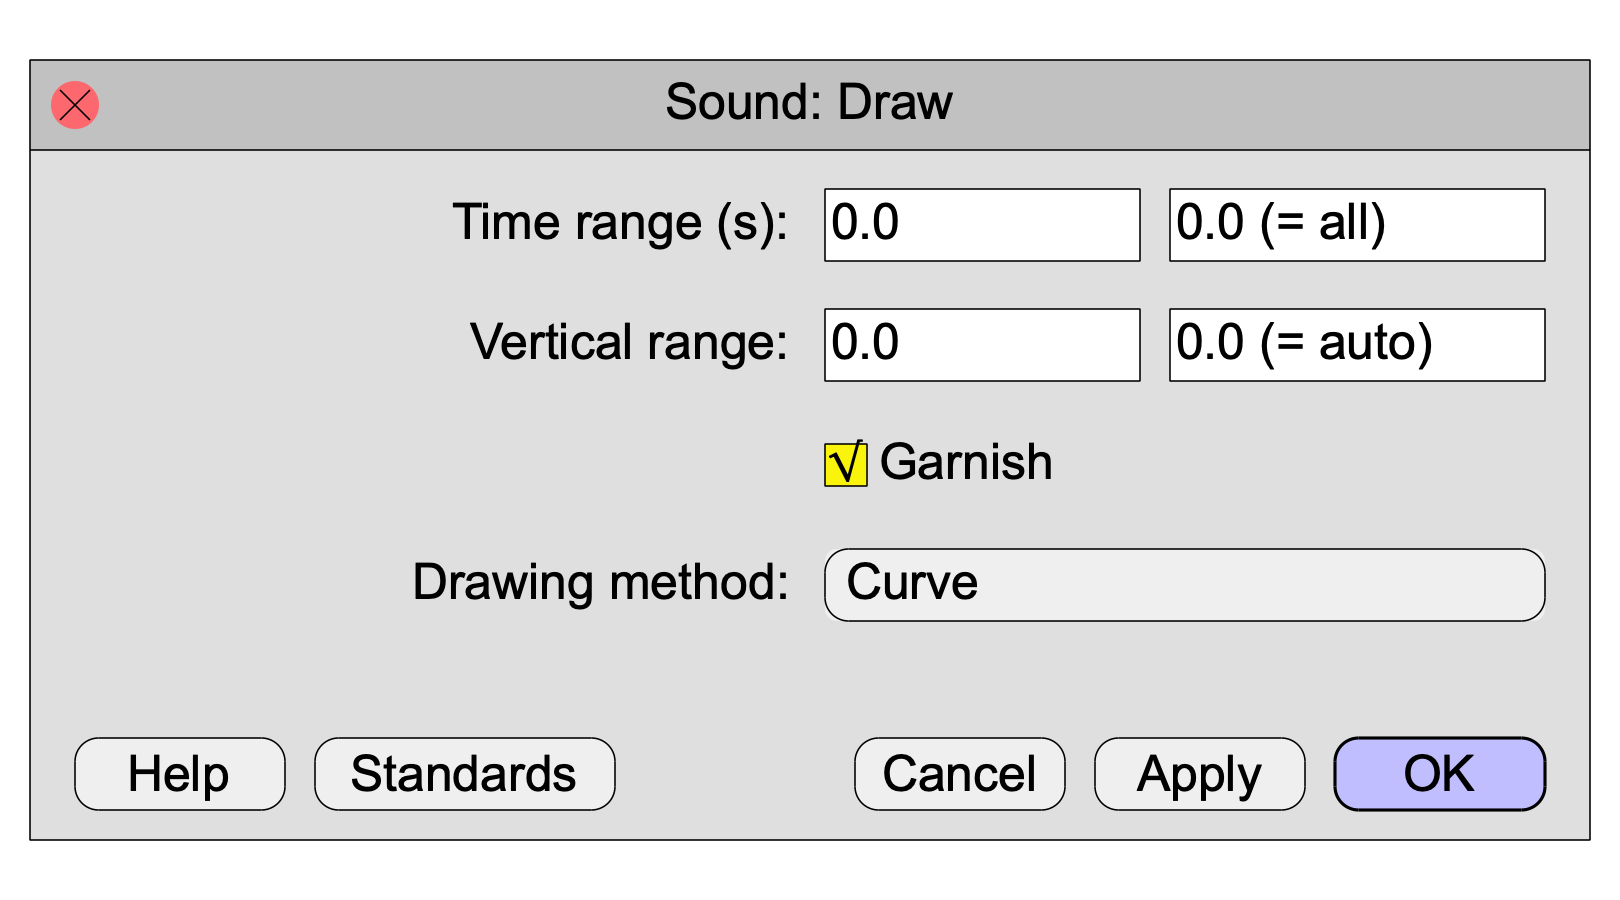
For instance, when you select a Sound, the command Draw... will appear in the Draw menu, and when you click it, Praat will present you with a settings window, which asks you to supply six pieces of additional information, i.e. six so-called settings (or in programming jargon: arguments):
In this example, all the settings have their standard values: you want to draw the whole time domain of the Sound, you want to have autoscaling vertically, you want to see garnishings around the picture (a box, labelled axes, and numbers), and you want the waveform to be drawn as a curve. Pressing the OK button in the above window is equivalent to executing the following script line:
Draw: 0, 0, 0, 0, “yes”, “Curve”
You see that in a script, all of the arguments are supplied after the command, preceded by a colon and separated by commas, in the same order as in the settings window, counted from top to bottom (and, within a line, from left to right). The texts “(= all)” and “(= auto)” above are just Praat’s explanations of what it means to type a zero in those fields (namely “draw all times” and “use vertical autoscaling”, respectively); in a script they are superfluous and you shouldn’t write them.
If you want to draw the sound with different settings, say from 1 to 3.2 seconds, scaled between -1 and +1 instead of automatically, with garnishings off, and with the waveform drawn as poles, you would have the following settings window:
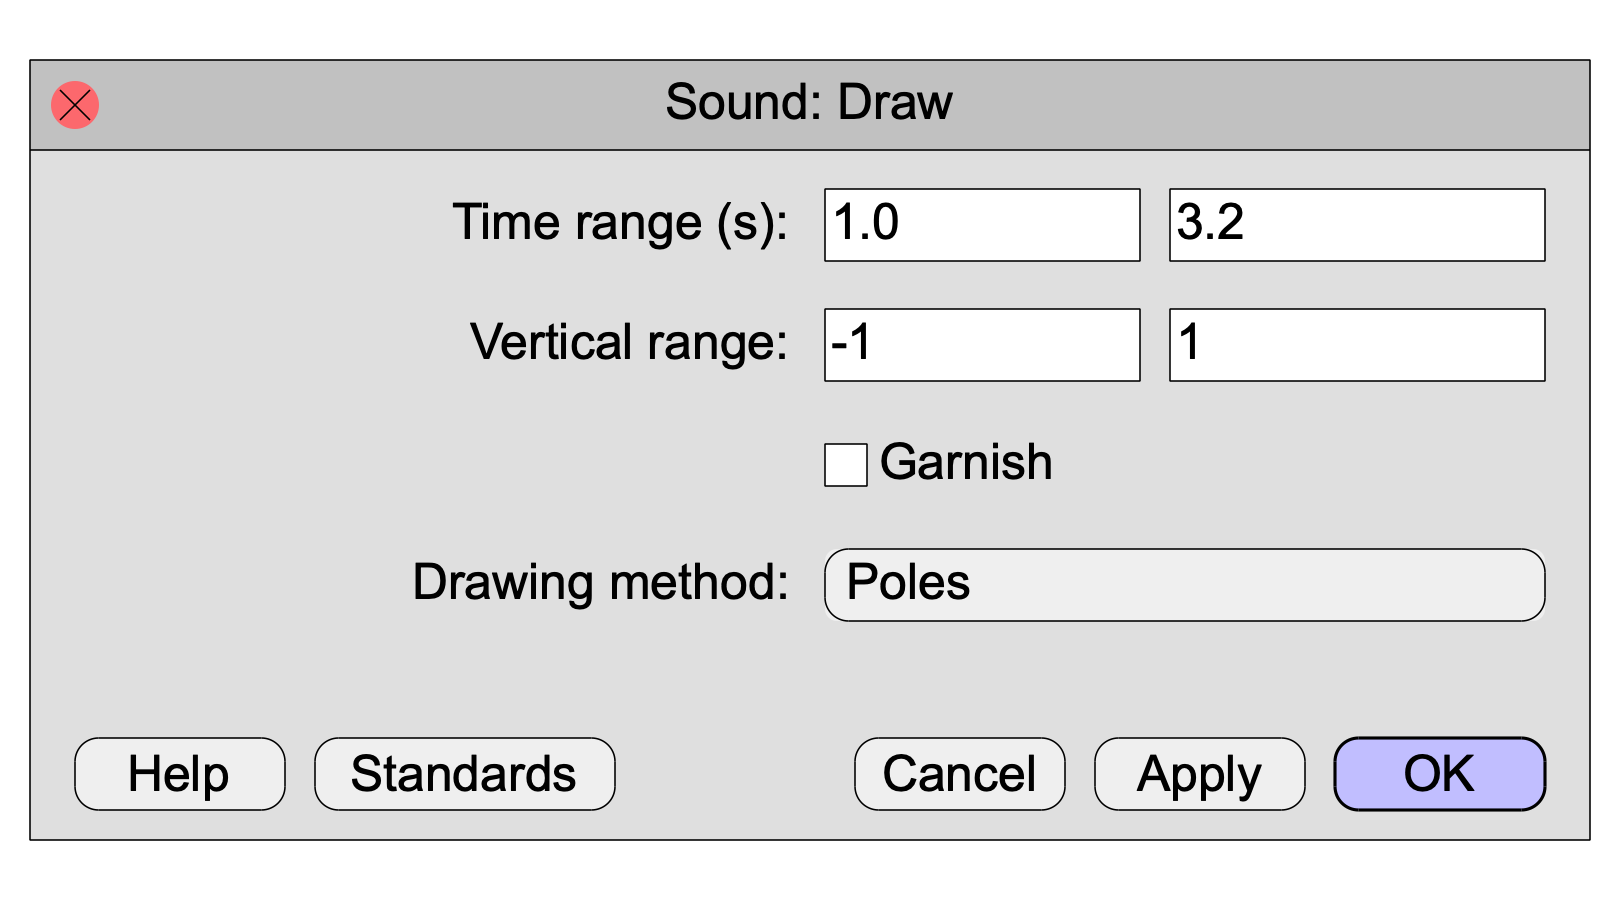
In a script this would look like
Draw: 1.0, 3.2, -1, 1, “no”, “Poles”
The first four arguments in the above examples are numeric arguments: they are (real or integer) numbers. You just write them in the script as you would write them into the settings window.
The fifth argument in the above examples (Garnish) is a boolean argument (yes/no choice) and is represented by a check button. In the script you write it as "yes" (including the quotes) or "no" (or as 1 or 0).
The sixth argument in the above examples (Drawing method) is a multiple-choice argument and is represented by an option menu. In the script you write the text of the choice, i.e. "Curve" or "Poles" in the examples.
A multiple-choice argument is sometimes represented by a choice box instead of by an option menu. For instance, the last example above could equally well have looked like
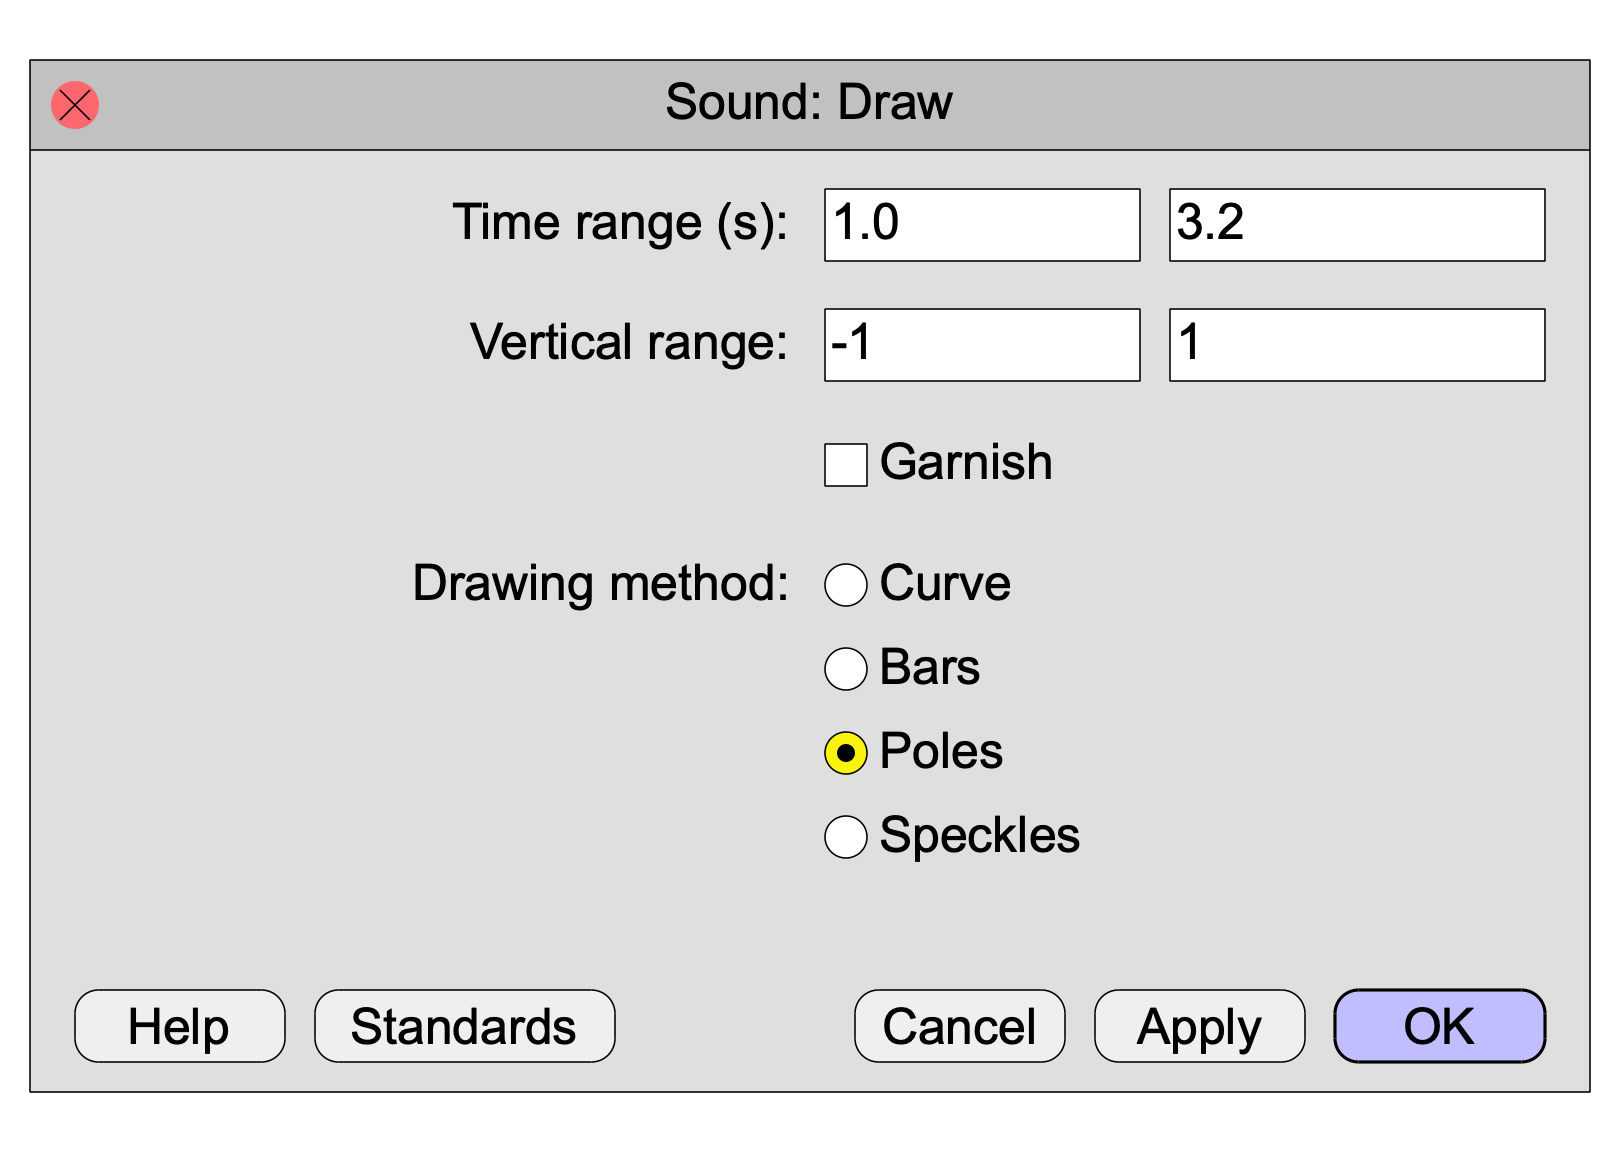
In supplying arguments to a command in a script, there is no difference between an option menu and a radio box. This last example will therefore again look like the following in a script:
Draw: 1.0, 3.2, -1, 1, “no”, “Poles”
Consider another frequently used menu command, namely Create Sound from formula... in the New menu:
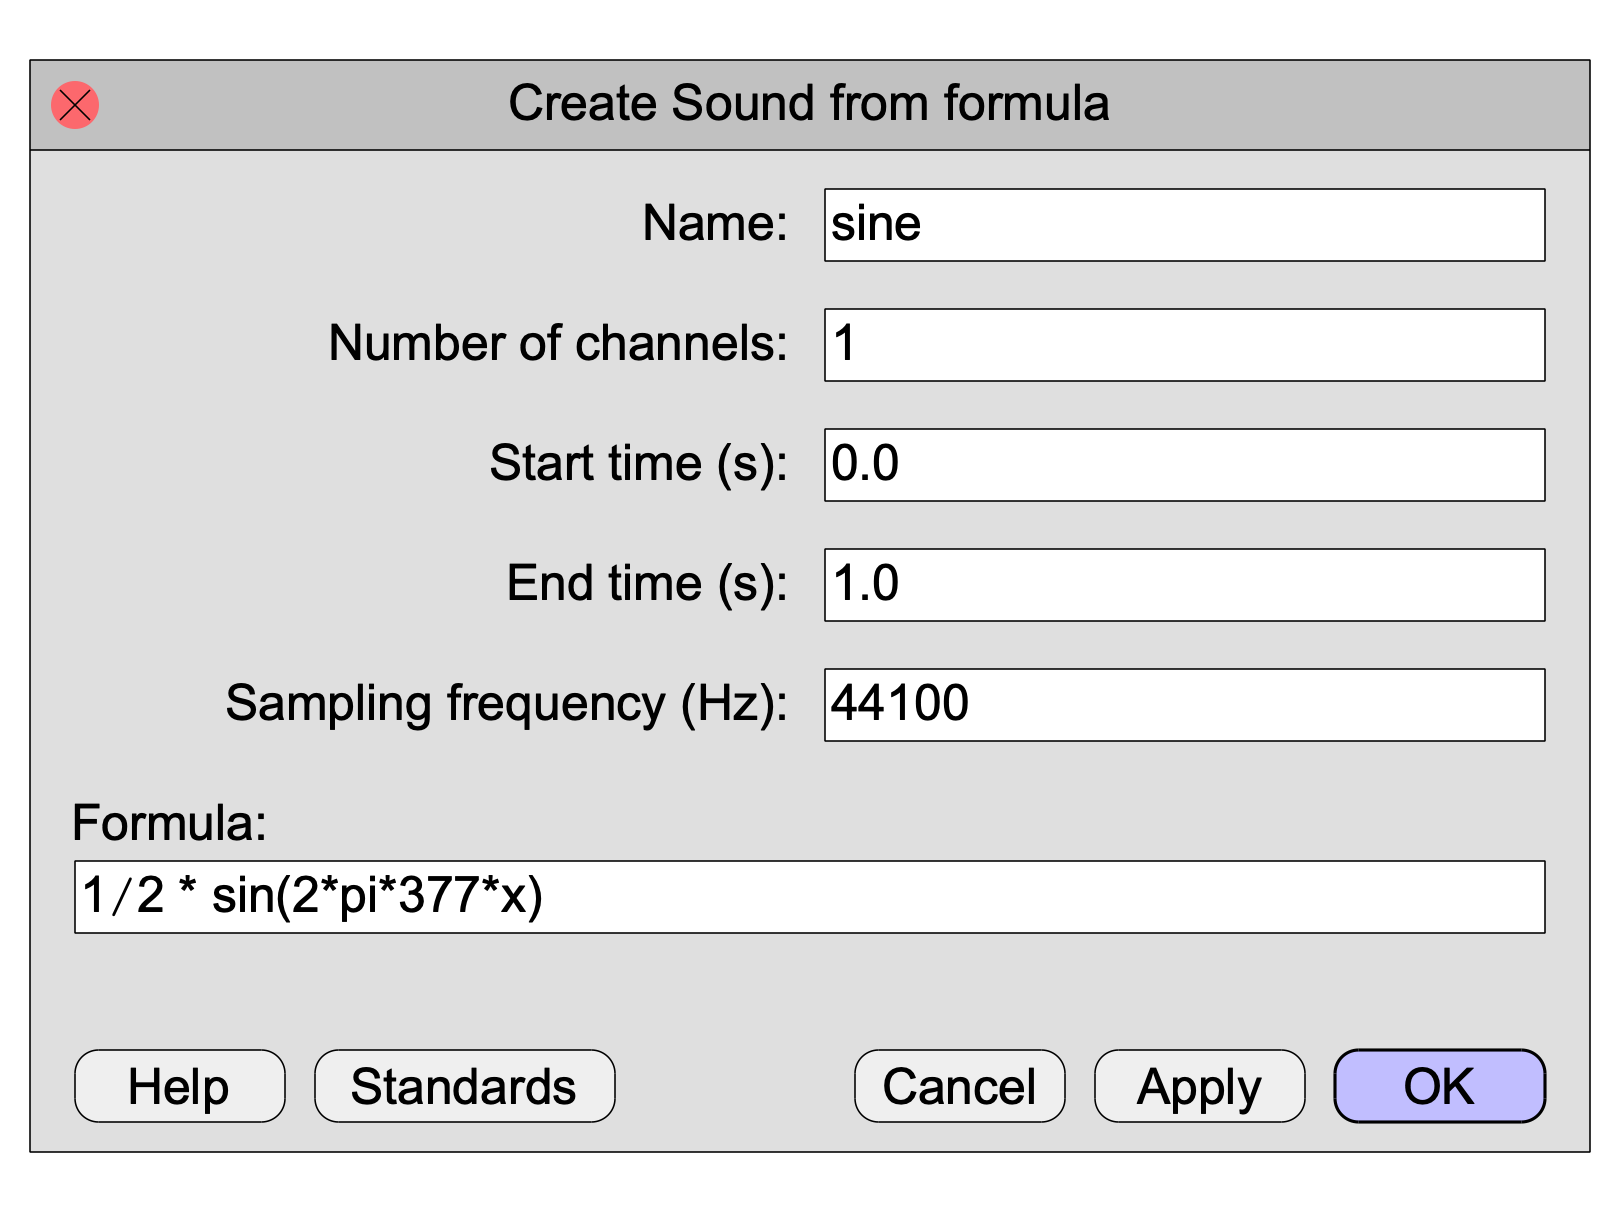
In a script this would look like:
Create Sound from formula: “sine”, 1, 0.0, 1.0, 44100, “1/2 * sin(2*pi*377*x)”
Both the first argument (Name) and the sixth argument (Formula) are text arguments. In a script they are written within quotes.
Sometimes it would be a bit awkward to write a formula that contains double quotes. Imagine you have a Table object with a column “stimulus”, a column “response”, and a column “correct”, and you want to have a 1 in column “correct” if the texts in the columns “stimulus” and “response” are the same, and a 0 otherwise. You would do this by selecting the Table and choosing the Formula... command:
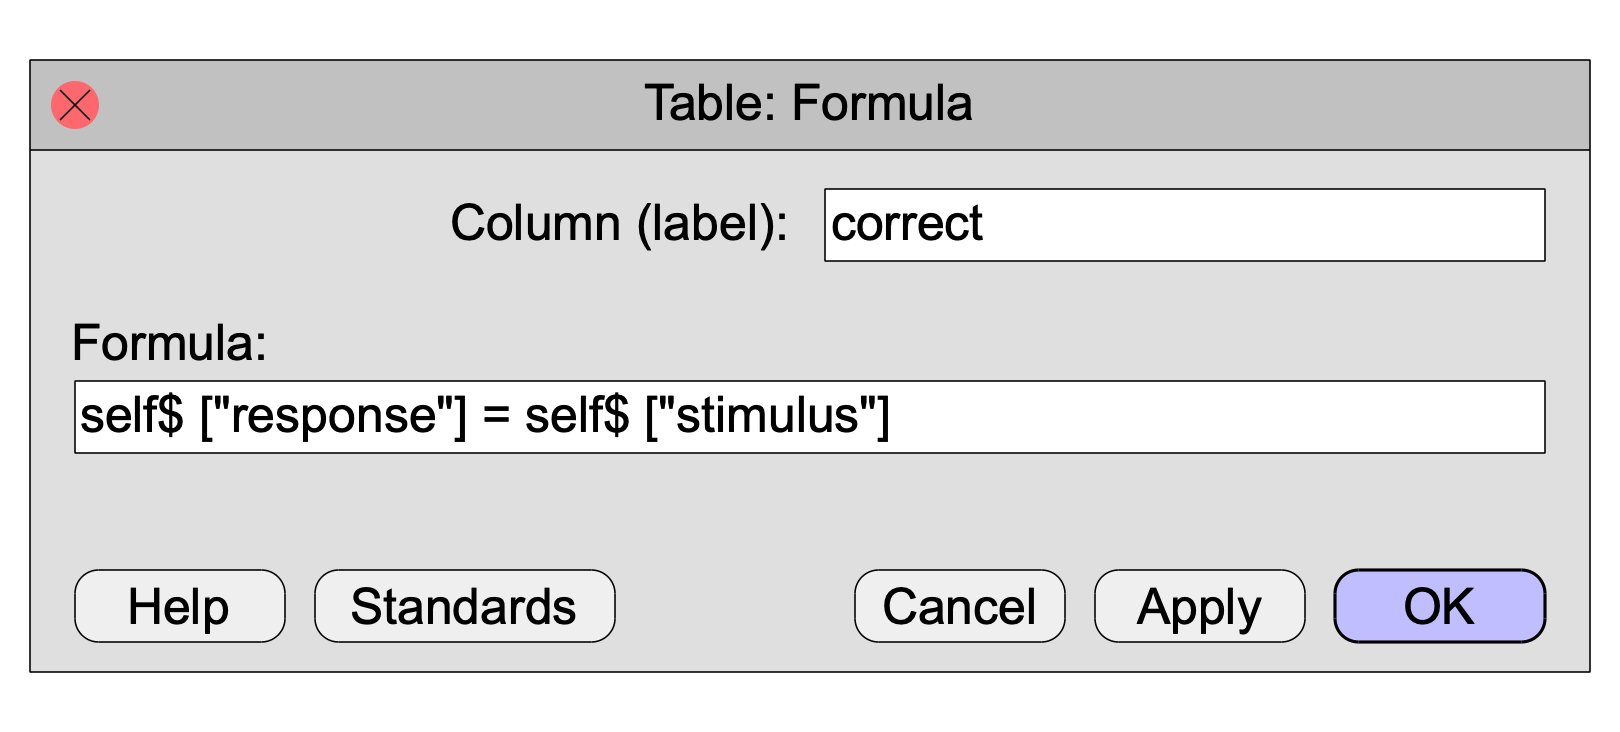
According to section 4 above, and according to Formulas 2.2. Representation of strings, you would have to write this in the following way in a script:
Formula: "correct", "self$ [""response""] = self$ [""stimulus""]"
The required doubling of string-internal double quotes is awkward. Therefore, there exists a special way for typing formula arguments, namely with the tilde ("~"):
Formula: "correct", ~ self$ ["response"] = self$ ["stimulus"]
This means that you can write the example of section 4 in an analogous way:
Create Sound from formula: “sine”, 1, 0.0, 1.0, 44100, ~ 1/2 * sin(2*pi*377*x)
The tilde is probably the preferred way to write formula arguments. You should remember, however, that the result is still a string (i.e. text), and you can treat it as a string with the string methods described later on in this tutorial.
Another way is to use curly quotes, for instance:
Formula: "correct", “self$ ["response"] = self$ ["stimulus"]”
or
Formula: "correct", "self$ [“response”] = self$ [“stimulus”]"
The commands from the Open and Save menus, and several other commands whose names start with Read, Open, or Save, present a file selector window instead of a typical Praat settings window. File selector windows ask the user to supply a single argument: the file name.
In a script you can either supply the complete path to the file, or supply a relative path.
A complete path includes both the folder (directory) hierarchy and the name of the file. This goes slightly differently on the Windows platform on the one hand, and on the Mac and Linux platforms on the other. If your user name is Miep, and your home folder contains a folder Sounds, and this folder contains a folder Animals, and this contains the file miauw.wav, you can open that file as follows:
Read from file: “C:/Users/Miep/Sounds/Animals/miauw.wav” ; Windows
Read from file: “/Users/Miep/Sounds/Animals/miauw.wav” ; Mac
Read from file: “/home/miep/Sounds/Animals/miauw.wav” ; Linux
(the part before your user name may be slightly different on your computer; use your command or terminal window to find out)
In these examples, “C” is the Windows drive letter and /Users/Miep or /home/Miep is your home folder. Both the home folder and the drive letter can be abbreviated away by using the tilde (“~”) in the path (this tilde has nothing to do with the tilde used in formula arguments):
Read from file: “~/Sounds/Animals/miauw.wav”
If your Sounds folder is not in your home folder but on your desktop, you do
Read from file: “~/Desktop/Sounds/Animals/miauw.wav”
(this works because on all three platforms, the desktop folder is a subfolder of your home folder)
If your Sounds folder is on a USB drive called PORCH, it would be something like:
Read from file: “G:/Sounds/Animals/miauw.wav” ; Windows
Read from file: “/Volumes/PORCH/Sounds/Animals/miauw.wav” ; Mac
Read from file: “/media/PORCH/Sounds/Animals/miauw.wav” ; Linux
Instead of all these complete path names, you can use relative path names. These are taken as relative to the folder in which your script resides, and help to make your script portable if you move the script along with your data.
Thus, if your script (after you have saved it!) is in the Animals folder mentioned above, i.e. in the same folder as miauw.wav, you would simply open the file with
Read from file: “miauw.wav”
If your script is in the Sounds folder mentioned above, i.e. in the same folder as where the Animals folder is, you would open the file with
Read from file: “Animals/miauw.aifc”
If your script is in the folder Scripts that is inside the Sounds folder, i.e. if your script is a sister folder of the Animals folder, you would open the file with
Read from file: “../Animals/miauw.aifc”
where “..” is the general way on all platforms to go one folder up in the hierarchy.
Note that on Windows you could use the backslash (“ instead of the forward slash (“/”), but with the forward slash your script will work on all three platforms.
Several commands in the World and Pen menus of the Picture window, as well as many object drawing commands, ask for a colour in the following way:
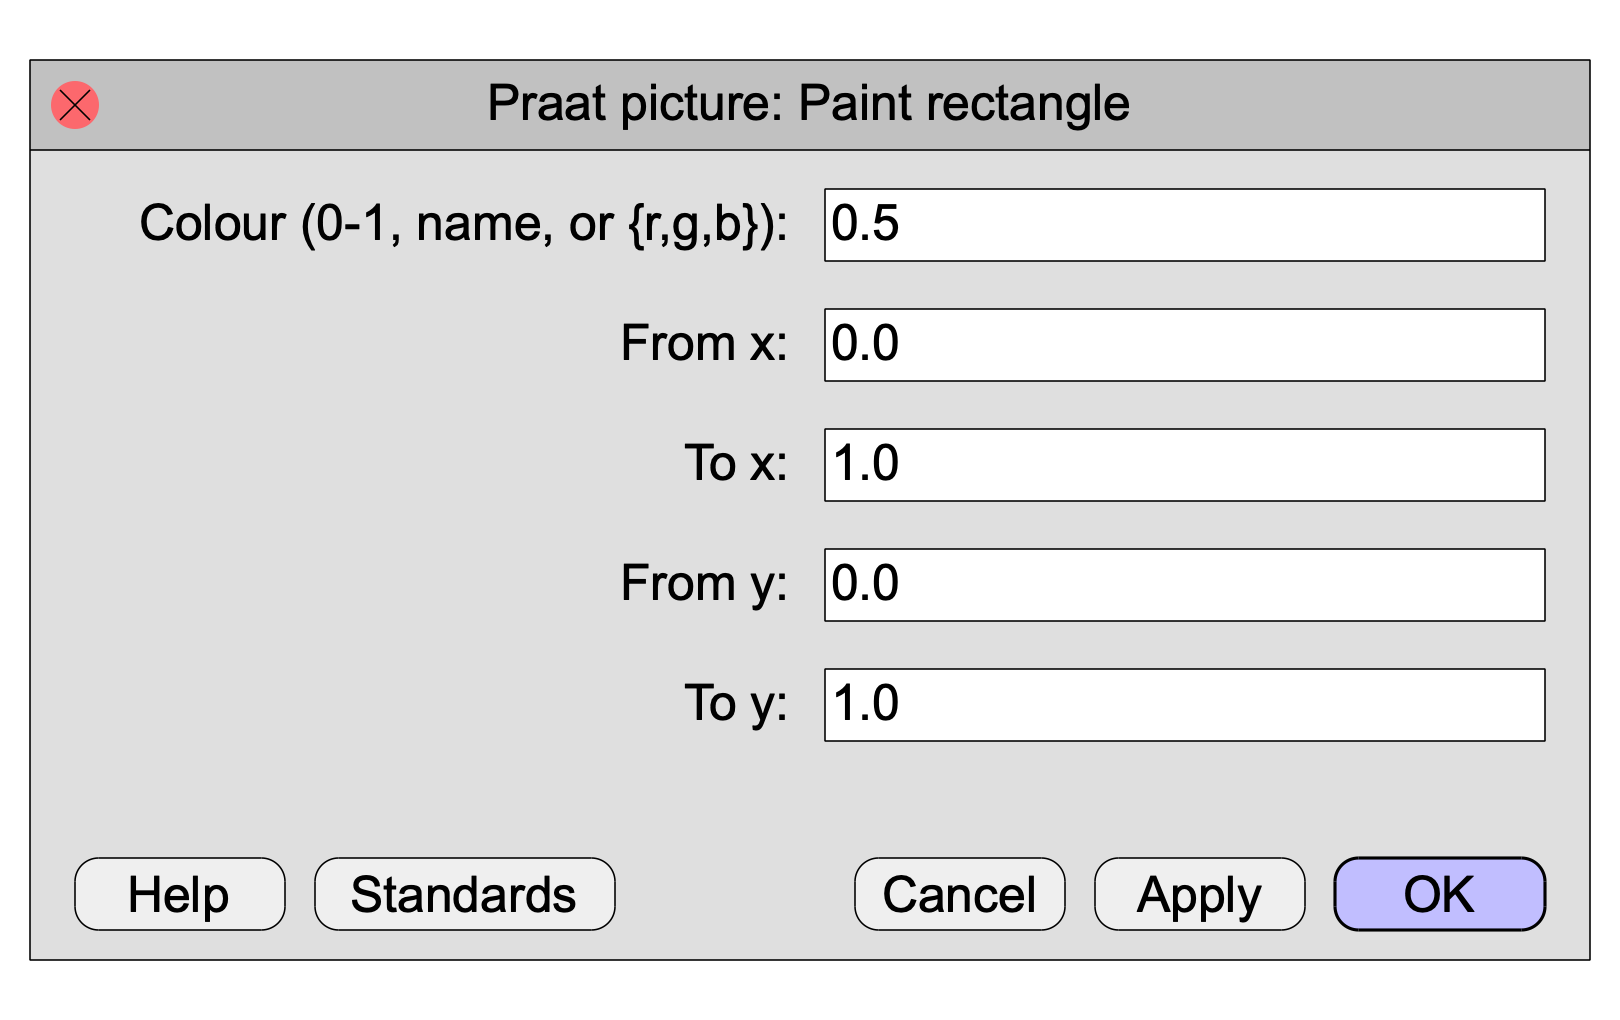
For the colour, you can supply, as text, one of the 16 explicit names that also appear in the Pen menu:
Paint rectangle: “maroon”, 0.0, 1.0, 0.0, 1.0

Alternatively, you can supply a grey value, as a number between 0.0 (black) and 1.0 (white). The following produces a very light grey:
Paint rectangle: 0.9, 0.0, 1.0, 0.0, 1.0

Finally, you can supply an explicit RGB (red–green–blue) value, as a “vector” of three numbers between 0.0 and 1.0. The following produces dark pink:
Paint rectangle: {0.8,0.2,0.4}, 0.0, 1.0, 0.0, 1.0

Now you know all the ways to write the arguments of commands in a script line. If you dislike manually copying arguments from settings windows into your script, or if you are not sure whether something is a numeric or a string argument, you can use the history mechanism: choose Clear history from the Edit menu in your ScriptEditor, click your command button, edit the arguments, and click OK. The command will be executed. Then choose Paste history, and the command line, including the arguments, will appear in the ScriptEditor at the position of the text cursor. You can build whole new scripts on the basis of this mechanism.
Paul Boersma 1999,2004,(“Arguments to commands”),2011,2013,2014,2017,2019,2020,2023