|
A tutorial example of how to evaluate the Acoustic Signal Typing in a corpus
Download the corpus .zip file from [To be announced] and extract it to a convenient location. Open TEVA and then click the Open button on the Main page. A file selection window will open. Navigate into the map you just downloaded and select the assigned table file. Then click Choose. The Main page now contains a display of an empty sound.
You will notice that after opening the Table file, some settings of TEVA have changed. The display type has changed to Spectrogram, with a range from 0-2kHz. The Speaker button at the bottom left has changed to a blue Spk button. When you click on the Spk button, a file will be loaded. If you just started, this will be the first file ([1] in the window title). If you already have worked on this project, the next file without an AST label will be displayed. Every time the Spk button is clicked, the next file will be loaded.
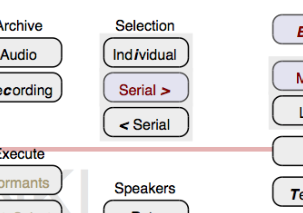
If you ever have to go to a different file than the next in the list, click on the Settings button to go to the Configuration page and below the Selection header click the < Serial button for the previous item in the list or Individual for selecting any item in the list. After that change, the direction symbol will be reversed on the Main page or the original Speaker button will reappear on the Main page. Use this button to step to or display the required file. To get back to the earlier state with the blue Spk button, click again on the Settings button to go to the Configuration page and click the Serial > button (which should change from black to red).
TEVA will keep the name of the last used file with speaker and recording data in the preferences file. Next time TEVA is opened, you just have to click on the Spk button to continue where you left off and get to the next recording.
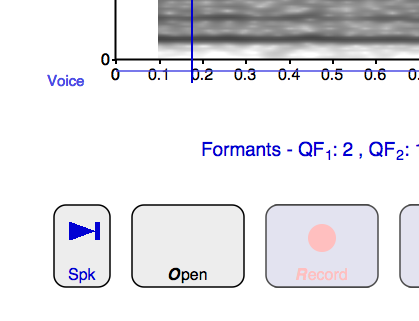
Use the Spectrogram (or another analysis display) to determine the Acoustic Signal Type. You can click inside the display to indicate a window of interest and use the Zoom&Select panel to navigate through the recording. Note that every (time) display will have a bar below it indicating the parts considered Voiced by Praat (www.praat.org) voicing detection (Pitch).
Inspect the recording using the Spectrogram and Sound windows. You can change the frequency range of the Spectrogram by selecting the desired top frequency in the Configuration page. After selecting the most stable part of the speech, decide how the speech can be judged according to following statements as Good, Mediocre, or Bad. See also Acoustic Signal Typing
With these statements in mind, pick an interval where the vowel is most stable. You can use the Zoom in and Zoom out buttons as well as the Previous (move left) and Next (move right) buttons in the Zoom&Select panel to navigate around. Help about signal typing can be found in the man pages (Acoustic Signal Typing) or in the Pathology window on the Configuration page. After you have decided which pathological type you want to assign, just press the number key (one of 1-4). Press 0 to remove your choice. After that, you can press Spk to go to the next recording.
You can also operate TEVA (almost) completely by pressing shortcut keys instead of using the buttons. The sequence Open -> Spk -> Play -> 3 -> Spk can be entered as o, x, p, 3, x. You will obviously have to choose the Table file after pressing o(pen).
To save your evaluations, click on the Settings button to go to the Configuration page and click the Save button (not the Save button on the Main page). A window will open which asks you where to save the Table. Select the file you opened before to replace the original Table. If you forget to save your work, TEVA will prompt you to save your work when you Quit or open another Table. Selecting Cancel will let you leave without saving your work. If you ever leave TEVA without saving the Table file, you will find a recovery file next to the original file. This file has the same name as the original, but with a ~ added. Open this file and save it to replace the original to recover the "lost" work. Note that this recovery file will be removed if you open the original file and either change something, Save it again, or Close it.
To set up local preferences for a project, create a file called TEVApreferences.tsv or .tevarc and store it in the same directory as the Table with the list of recordings. For example, the preferences for this example read (white-space is single tabs):
Key Value
config.frequency 2000
config.showFormants 0
config.speakerSerial 1
mainPage.draw Spectrogram
A complete preferences file as created by TEVA, e.g., ~/Library/Preferences/TEVA/TEVArc.tsv, could look like (again, use single tabs to separate the fields):
Key Value
config.language EN
config.frequency 2000
config.showFormants 0
config.speakerData /Users/guest/Examples/SignaltypeVoiceSamples.Table
config.speakerSerial 1
config.recordingTime 4
config.showBackground 1
config.input Microphone
config.muteOutput 0
config.openLog /Users/gues/Library/Preferences/TEVA/log
mainPage.draw Spectrogram
Note that the last Table used is stored in the preferences file (here it is SignaltypeVoiceSamples.Table).
© R.J.J.H. van Son, March 8, 2012